

 Chuck Lee

Account
Issue introduction
Check the Warranty Period

Upgrade Warranty(Update warranty period)

Operation guidance
Check the Warranty Period
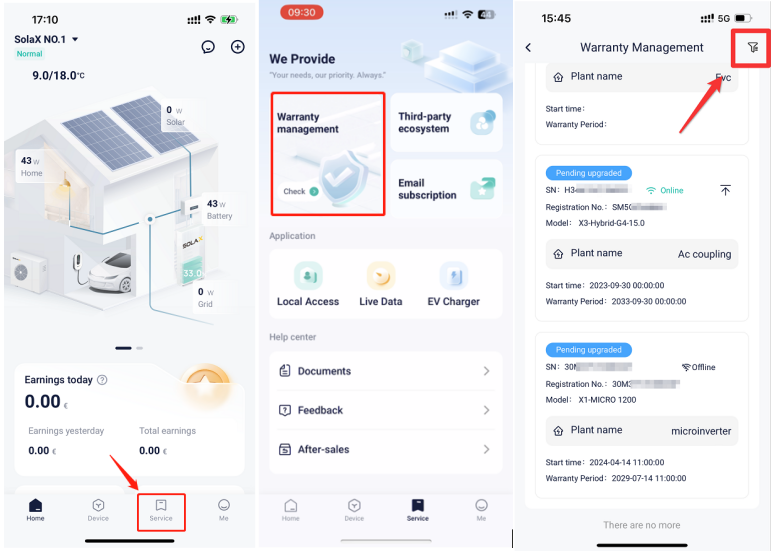
APP:
Go to <Warranty Management > to check the warranty period.
Setting path:Service→Warranty management

Web:
Step1: Go to the website <https://www.solaxpower.com/> , then click “Warranty Inquiry”
Setting path:Service→Warranty→Warranty Inquiry


Step2:Enter the inverter SN to check the warranty start date and the warranty end date, then click “download” to download SolaX warranty certificate.
Setting path:Device SN→Warranty start date/Warranty end date→Download


Upgrade Warranty
APP:
Step1: Go to <Warranty Management > and tap on “Filter”.
Setting path:Service→Warranty Management→Filter
Step2: Filter online inverters and tap on “Upgrade”, then tap on “OK”, Country, region and installation address are automatically generated.
Setting path:Online→Upgrade→OK

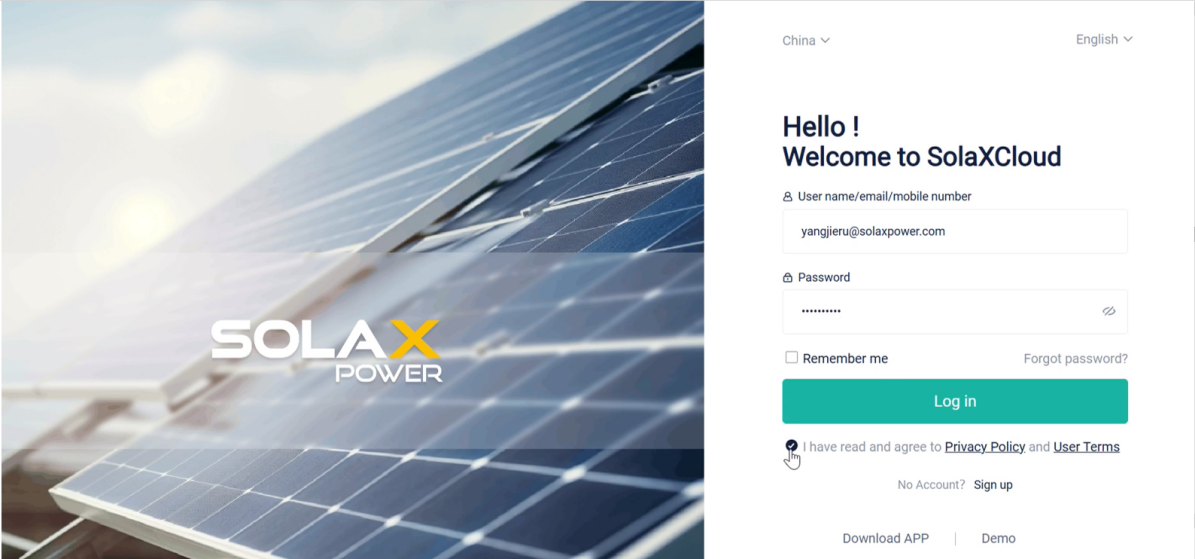
Web:
Step1: Log in the end-user account of SolaX Cloud on the website < https://www.eu.solaxcloud.com/user-center/>, then click “Service” and “Online Warranty”.
Setting path:Log in→Service→Online Warranty


Step2: Find the online inverter, click “upgrade warranty” and select battery/master controller SN, then click “Sure”.
Setting path:Upgrade warranty→battery/master controller SN→Sure


Please note
- If the setting fails, please check your mobile network, ensure a stable connection, log out of your account, and then log back in. Follow the steps above to make the changes.